Building a Model
We allow anyone to train and build machine learning models using appropriate training data. In the following tutorial, you will learn how to build your own model using a simple example.
Click Sign In at the top-left of the website and sign in to your Stream.ML account.
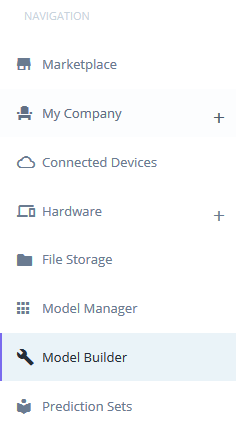
Click on Model Builder in the Navigation sidebar to bring up the Model Builder page. This page lists your models currently in progress and allows you to build a new model.
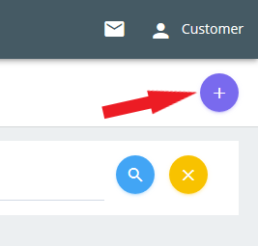
Click the “Plus” button to create a new model.
You will see several information fields that need to be filled out to create your model. Click Create when the information is complete.
- Name – The name of your model.
- Description – A place to describe your model and enter notes.
- Photo – Choose an image file for your model that will display on the Stream.ML website.
- Hardware Model – Choose the hardware model that will be used to obtain training data for your model. In this case, choose “RGB Camera”.
- Hardware Profile – The Hardware Profile defines the settings that will be applied to your hardware based on your data acquisition conditions. For the RGB Camera model, choose RGB Default Profile. Other hardware models (such as cameras or spectrometers) may require the use of different hardware profiles and can be added and edited as needed.
- Model Type – Choose the type of model that will be trained. Several model types are available, and in general, the Two Class and Multi-Class Convolutional Neural Network models can be used to classify objects in images (e.g.: types of plant species) and Regression models can be used to quantify properties of objects in images (e.g.: percentage of nitrogen content in leaves). Our example will be to differentiate between dogs and cats, so we’ll choose a Two Class Convolutional Neural Network model.
- Tags – Enter any tags (separated by commas) that will facilitate finding your model in later searches.
- Add Component – These define the objects in your images that the model will be trained to identify. Fill in the Name and Description and choose a color for that component. In our example, we will have two components – Cats and Dogs. In a Multi-Class model, there will be an Add Component button which will allow you to add as many components as needed.
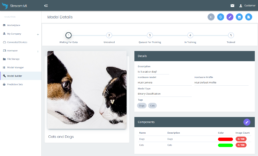
Now that your new model is created, you will be taken to a page where you can view the model’s status. There are also several functions that can be accessed here using the buttons in the title bar. These are:
 |
Back – Go to the main Draft Models list. |
 |
Refresh – Refresh the page to check for any updates. |
 |
Edit – Edit the properties of the current draft model. |
 |
Training Images – Add images for training to the model. |
 |
Training Results – View reports summarizing the results of image training. |
 |
Train – Train the model using the training images. This button will become available once enough training images are added to the model. |
To begin adding data, click File Storage in the Navigation sidebar. You will be taken to the File Storage page which allows you to manage all your company’s data.
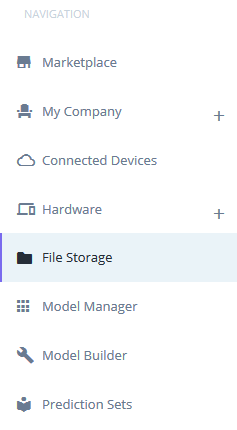
Press the “Plus” button to add a new folder to your company’s file storage.
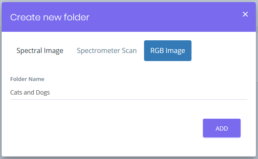
A window will pop up and ask for more information on the folder. Choose the type of data that will be stored (RGB Image) and name the folder. The type of data is important, as the model will only accept data from folders that contain the correct data type. In the case of Spectral Images or Spectrometer Scans, the matching Hardware Model and Profile also must be selected. Click Add to finish creating the folder.
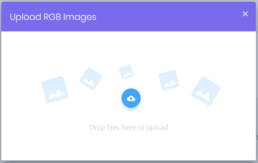
To add images to the folder, click the “Upload” button. This will bring up the Upload RGB Images window. You can upload images by dragging them onto the window, or by clicking the window to bring up a file explorer window.
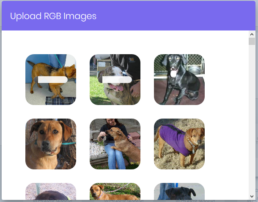
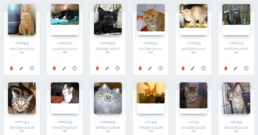
Once the images are added to the folder, you will be able to delete them, edit their labels (filenames are used as default labels), or view more information on the individual images, including which models they have been used in.

The images can now be added to the Cats and Dogs model. Click on Model Builder, then on View Details on the Cats and Dogs model card.
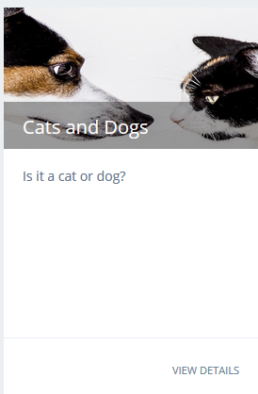
The model is currently in the state “Waiting For Data”. In the lower right corner, the “Components” card shows we need to add at least 100 images for each component to begin training, although to make a truly robust model, hundreds or even thousands of images may be required. To add the images, click on the “Training Images” button on the title bar.


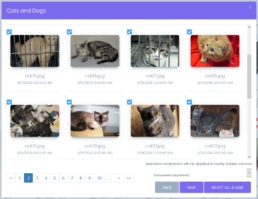
In the Training Images screen, press the “Plus” button. This will bring up a window that lists all storage folders that have the same hardware profile as the Cats and Dogs model. Click on the “Cats and Dogs” folder to continue.
Click Select All & Save to add all the images in the folder to the model. You can also click images that you want to add to the model individually and then click Save to add all checked images. If so desired, you can select one of your model’s component labels in the drop down menu at the bottom of the window to apply that label to all selected images. Once images have been associated with a model, they will remain checked in the add images window (to prevent image doubling), and can’t be deleted from file storage unless the associated model is deleted.
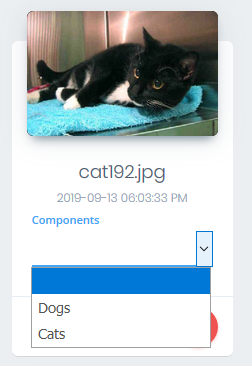
Now that all the images are added to the model, they must be identified by the component that they contain (cat or dog). For each picture, click on the dropdown menu under “Components” and choose the correct component.
Once all pictures have their components identified, click on the “Back” button to return to the Model Details page. Now that we have enough images, the model’s status has updated to “Untrained” and the yellow “Train” button is now available.

Click the “Train” button. A Pre-training Report containing some details of the training process is shown. Click Train to begin the training process, and you will be taken back to the Model Details page, where the model’s status will update to “Queued for Training”. If you refresh the page after some time, the status will update to “In Training” when it leaves the queue.
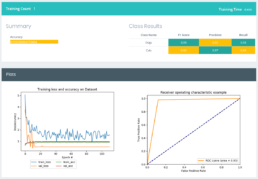
After some time, depending on the amount of training data and complexity of the model, the model’s status will change to “Trained”. You can now click the “Training Results” button to see how your training went. In the Model Training Results screen, you can see a quick summary of all the training runs done so far, and click on them to view more details.
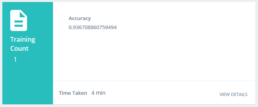
Further training runs requires that the training data be changed in some way (e.g.: new data, changed components, etc.).
Clicking on view details brings up more information on a training run, including model accuracy and other statistical measures. If the model’s performance is satisfactory, it can be deployed for use in the Model Manager by clicking the “Move to Model Manager” button.
